


Troubleshooting a SolarEdge system


Need help troubleshooting your Vivint Solar system with a SolarEdge inverter? You’ve come to the right place. Follow the below steps to troubleshoot your solar energy system, so we can help you generate clean energy for you and your household.
Step 1. Check your solar devices
The first thing we’re going to do is check to ensure all of your solar devices have been properly activated. To do this:
It’s usually on the outside of your home, or in your garage.
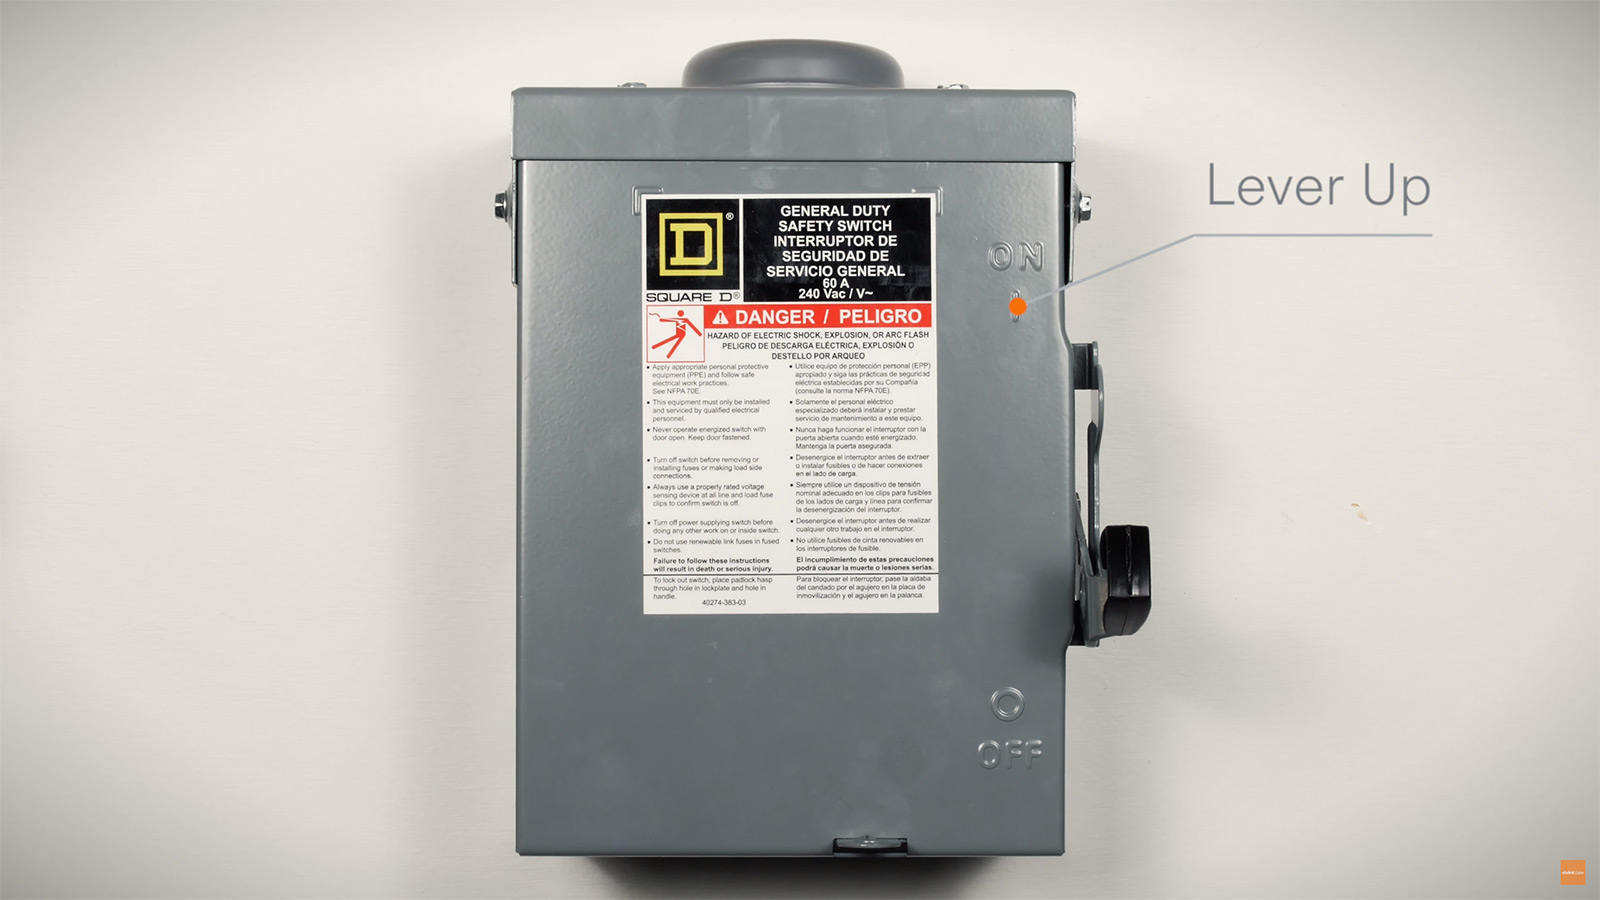 2. Check to ensure that the lever on the side of the box is pulled up in the “ON” position.
3. Go to your electrical breaker box.
2. Check to ensure that the lever on the side of the box is pulled up in the “ON” position.
3. Go to your electrical breaker box.
It could be inside your home, on the outside of your home, or inside your garage.
 4. Open the breaker box and look for your solar breakers.
They may be labeled “solar,” “solar breaker,” “pv,” or “photovoltaic.” Check to ensure the solar breakers are switched to the “ON” position. (Note, the “ON” position is normally the direction facing inwards, towards the center of the breaker box.)
 5. Depending on your area or the set up of your solar energy system, we may have installed additional solar breakers in a secondary box near your electrical panel.
That box may look something like this:
 6. To open it, locate the little lever at the bottom.
Pull up on the lever, then pull the front face of the box towards you. It should slip down and rotate open. Check to see whether it contains other solar breakers. If it does, ensure they’re in the “ON” position.
Step 2. Identify your SolarEdge model
In order to effectively troubleshoot your solar energy system, we need to determine which type of SolarEdge model we installed on your home. Locate your SolarEdge inverter (usually on the outside of your home, or in your garage) and look at it.
If your SolarEdge device is long and has a screen on the front, it means you have a SolarEdge A or StorEdge inverter. Click the link to go to the next step in Troubleshooting a SolarEdge A or StorEdge inverter.

If your SolarEdge device is short and has a screen on the front, it means you have a SolarEdge HD Wave inverter. Click the link to go to the next step in Troubleshooting a SolarEdge HD Wave inverter.

If your SolarEdge device is short and doesn't have a screen on the front, it means you have a SolarEdge HD Wave Screenless inverter. Click the link to go to the next step in Troubleshooting a SolarEdge HD Wave Screenless inverter.
