


Troubleshooting a SolarEdge system with a wired gateway connection


If you can believe it, Vivint Solar installs two different types of gateway connections—a wired gateway and a wireless gateway—and we never install them together. This means that your system either has one or the other. Let’s go through them so we can troubleshoot your system effectively.

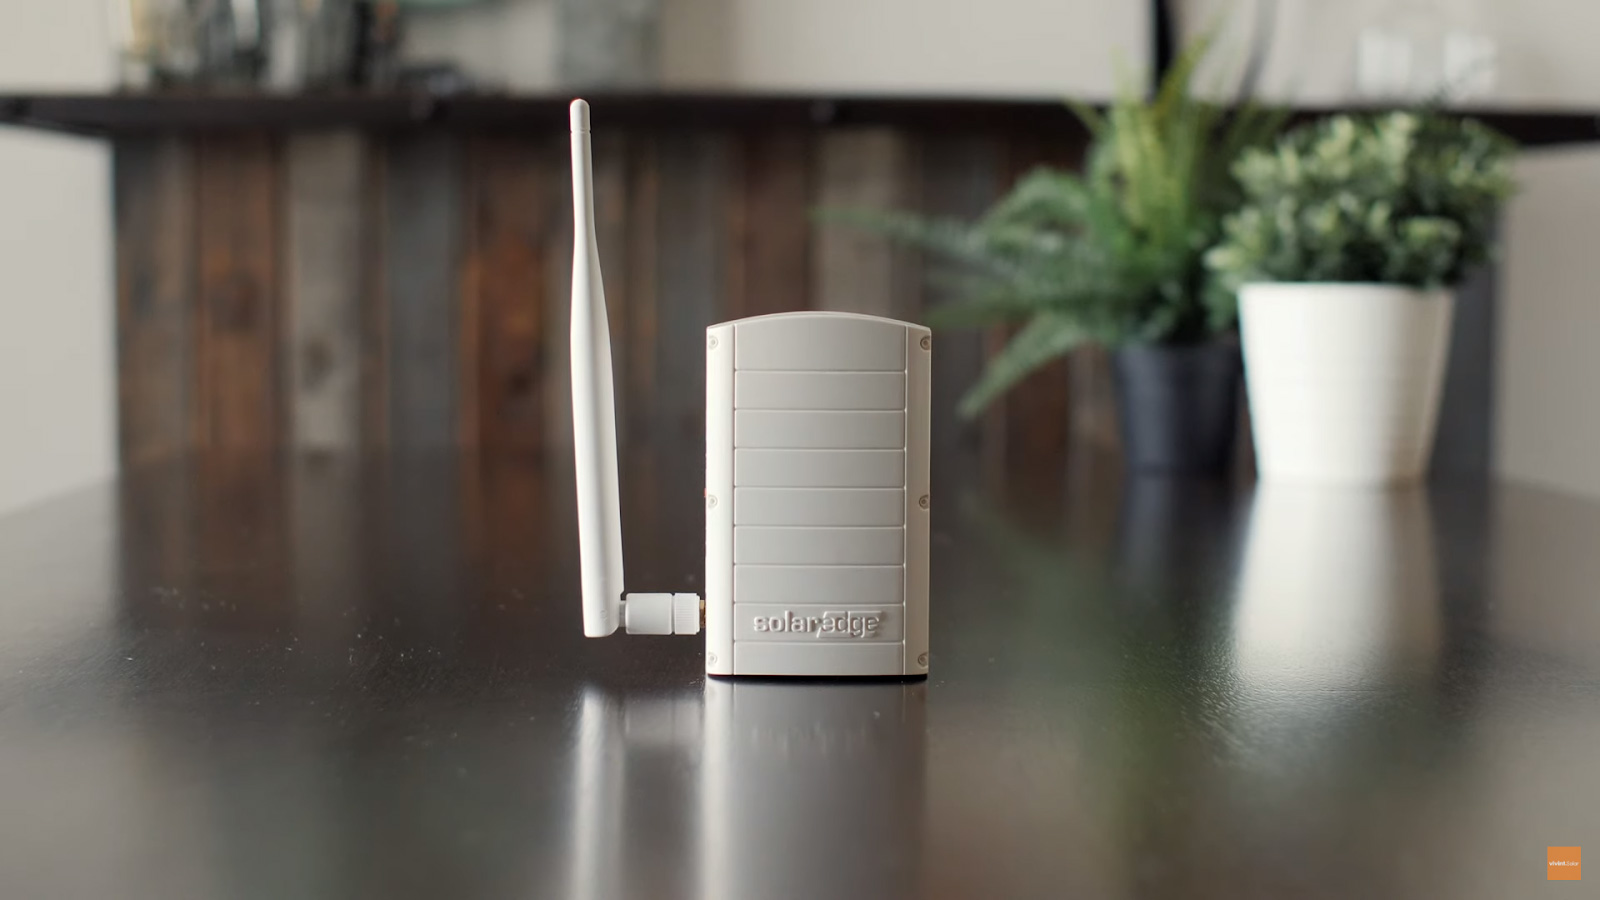
This is a wired gateway. We installed it so we could connect your SolarEdge system to the internet. It’s usually plugged into the power outlet nearest your internet router. It should be white, about three inches tall, and have an antenna on the side of it. If you’re able to locate it, follow the below steps to troubleshoot your wired gateway connection.
If you’re not able to locate a wired gateway, it means you have a wireless gateway connection. Click the link to go to the next step in Troubleshooting a SolarEdge system with a wireless gateway connection.
Troubleshoot your gateway
 3. If you don’t know what your internet router looks like, here are a few examples:
 4. Look at the lights on the side of your gateway.
They will indicate whether or not the system is connecting to the internet. We’re going to go over each of them to ensure that the gateway is working properly. Don’t worry, though. This is pretty easy and should only take a few minutes.
Now that you’ve located your gateway, we’re going to go over how to read it.
Reading the light on your gateway
The top light is called the “S_OK” light and represents internet connectivity. If the top light isn’t on, it means that the solar system isn’t connected to the internet. To verify this, you should see the “Link” light (the little yellow light just below the S_OK light) blink every five seconds. If it’s not blinking, it’s not connecting.

 2. Unscrew the antenna from the gateway.
 3. Plug the gateway into a power source as close to the inverter as possible—preferably within line of sight.
You can do this by locating inside outlet closest to the inverter and plugging the gateway into that. You can also try going outside and locating an outlet that is within direct line of sight of your inverter.
4. Now that the gateway is plugged in, look at the red configuration button on the side of the gateway. It should look like this: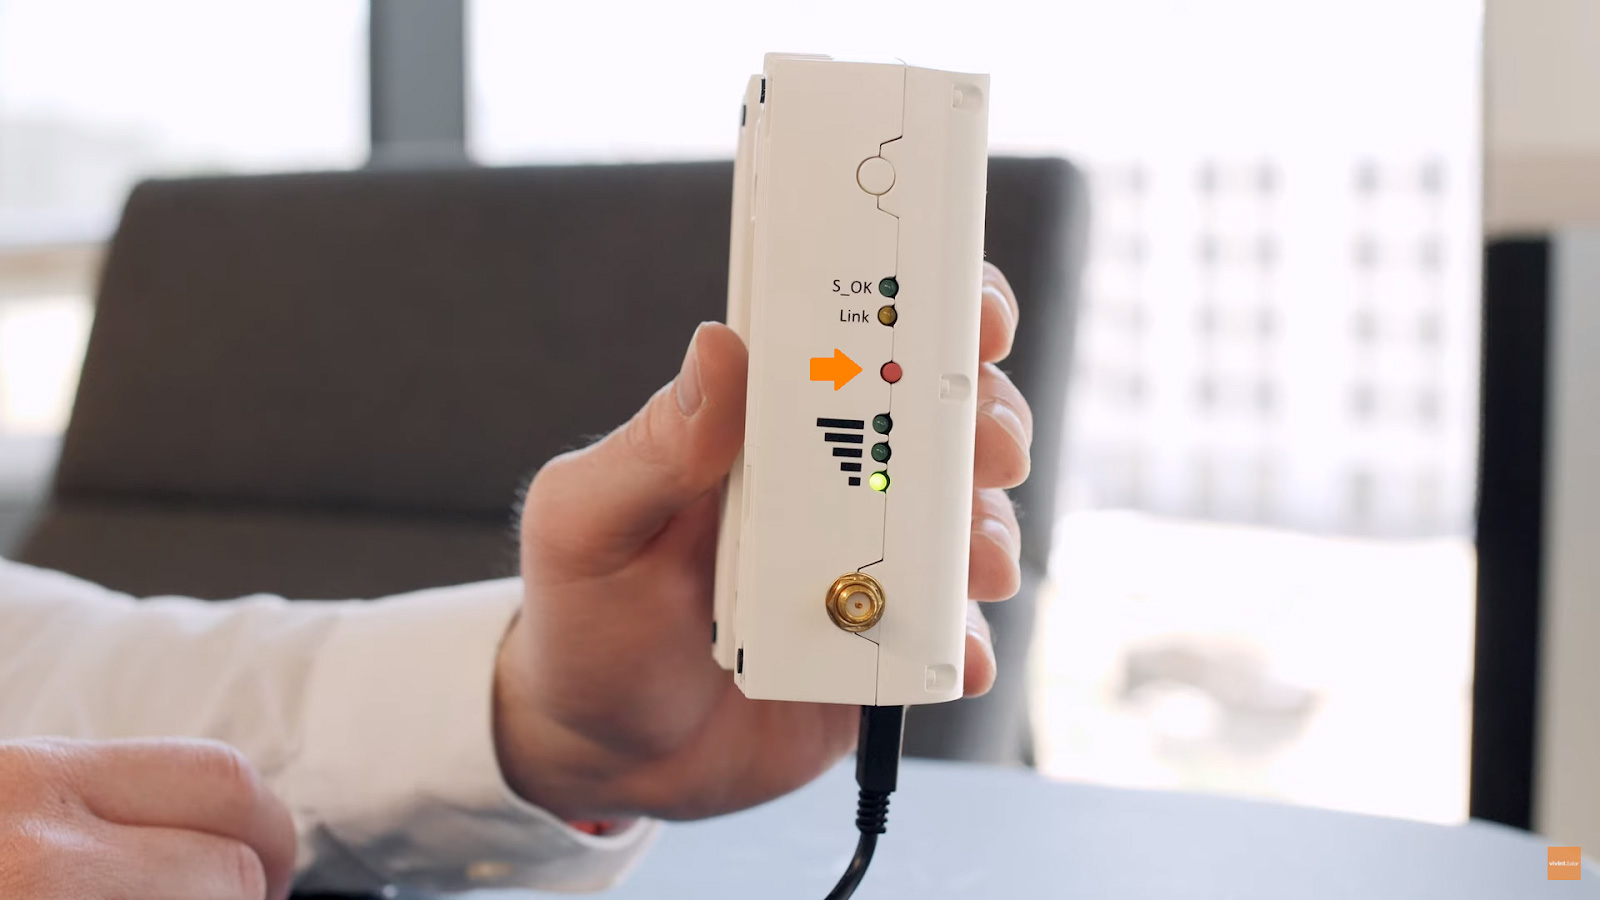 5. Hold down the red configuration button until all five lights are illuminated and solid, then let go.
 6. All five lights should blink for at least fifteen seconds, but no longer than three minutes.
 7. Once the blinking stops, all five lights should extinguish.
 8. At this point, you should start to see the yellow “Link” light blink every five seconds.
This means the Gateway is now communicating to the inverter.
9. Now unplug the Gateway from its current location and screw the antenna back on. 10. Connect both the ethernet cable and the power cable ends back into the Gateway, and plug the gateway back into its original outlet.
Ensure your internet router is working properly.
In most homes, it's usually near the computer and could look like any one of these devices:
2. Unplug your router.
3. Wait 30-seconds.
4. Plug it back in.
5. Now look at the bottom on your gateway.
There should be an ethernet cable plugged into it. Check to ensure that the ethernet cable is secure by pushing it into the bottom of the gateway until you hear a click. If you can’t see an ethernet cable, it’s probably the cause of the problem. When we installed your system, we should have provided you with an ethernet cable, so we could connect the system to the internet. Look around and see if you can find it. They come in a wide variety of colors and have ends that look like this:
 6. If you find your ethernet cable, great!
If not, that’s okay. Reach out and let us know that you need a new one. We’ll send someone out to replace it for you.
7. Check to ensure that the other end of your ethernet cable is plugged into your router.Simply locate your internet router again and flip it over. On the back, look for a section or “port” that has the word "LAN" near it. Now check to ensure that the cable is secure by pushing it into the bottom of the gateway until you hear a click.

That’s it—you should be all set. Roughly 24-48 hours after you’ve run through the troubleshooting steps, we recommend that you check your system production by logging into account.vivintsolar.com. If you don’t see any production results, Contact Us and let us know what steps you took to try and troubleshoot the issue. We’ll send someone out who can help.